Incredible AM Pvt. Ltd. is a company based in Pune, which is known for its innovative, quality, cost-effectiveness, and customer-centric products. We are India’s first ISO 13485 and ISO 9001 certified company for manufacturing of patient-specific implant/ Customized Implants using 3D metal printing. 3D Incredible has been accredited with various International awards for excellent 3D printing services in the healthcare industry.
We at 3D Incredible are committed and passionate to help patients with our high-quality 3D printed implants. Every patient is different and requires different care and treatment. Especially when it comes to implants, every patient should get personalized treatment as no two individuals have the same anatomy. Thus, we provide patient-specific customized 3D printed implants and services to help surgeons and patients in the best possible way.
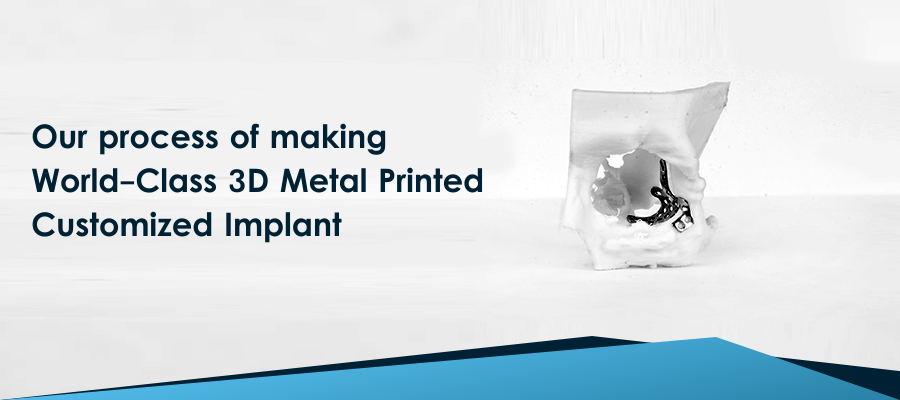
Our implant designing process is highly superior and precise to attain complex implant structures with the highest strength and stability. Let’s see what are the steps involved in our process of making world-class 3D metal printed customized implants.
1. CT/ MRI Scan: This is the first and foremost step in designing a customized medical implant. Patient’s clinical situation is recorded and transferred into a virtual model through imaging technology like 3D surface scanning or volume scanning techniques such as Computed Tomography (CT) and Magnetic Resonance Imaging (MRI). The CT/ MRI scan capture a stack of two-dimensional slices of the patient’s body. These scans help in diagnosing muscle and bone disorders such as bone tumors and fractures. The major difference between an MRI and CT scan is that the former uses radio waves and the latter uses X-rays for the scanning process. For customized implant designing, we require 0.6 mm or 1 mm slice thickness CT scan.
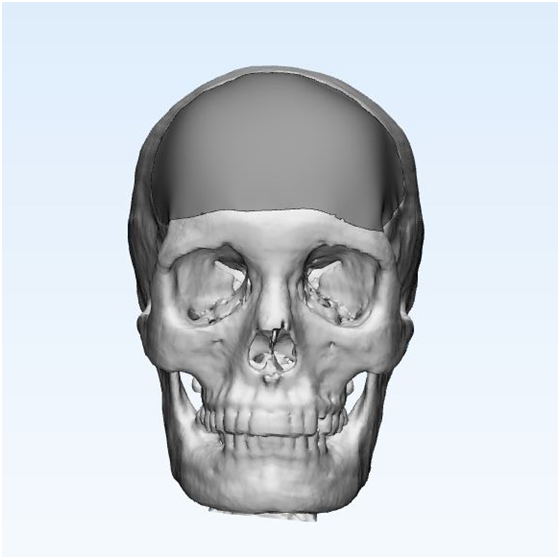
Convert CT/ MRI scan into 3D CAD model: The next step is to convert the CT/ MRI scanned data which is in Diacom format to a 3D CAD model. The imaging data are gathered from different angles and then processed by software which allows a virtual 3D model to be constructed that accurately reflects the patient’s situation.
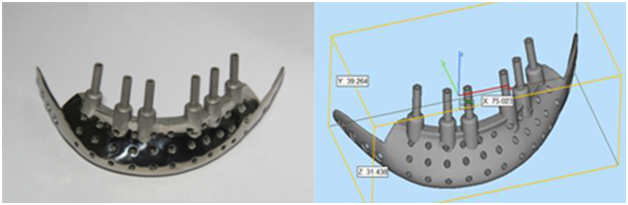
3. Design Process: After the body part is scanned and converted into 3D CAD model, the design process begins. The medical conditions, AM process & surgery process have to be taken into account while designing the implant. Best results are achieved by establishing a continuous process of knowledge transfer between doctors, designers and production team.
At 3D Incredible, we use US FDA and CE approved licensed softwares. These are the world’s best softwares available currently.
4. Design approved by Surgeon: Medical implants are regulated and classified in order to ensure safety and efficiency to the patient. Patient specific implants involve multiple risks such as surgical risks during placement or removal. Patient-specific implants/customized implants are designed as per the specifications and requirement of surgeon designed suiting to the best treatment to the patient. Thus, the designs of medical implants should be first approved by Surgeons before production in order to avoid any implant failure.
5. Building Implant on 3D Printing Machine: After the design is approved by Surgeons, it is time to build the implant on the 3D printing machine. The CAD model is then converted to an STL file and the implant design is sliced into 2D layers stacked on top of one another. The STL file and material are loaded into the printer and the printer is set-up with printing parameters. The 3D printer builds the model by depositing the material layer-by-layer. After the first layer of the physical model is done, the 3D printing machine builds another layer of powder on top of the first layer. This process is repeated until the object is completed.

6. Post Processing Operation: After printing is done there are various post-processing operations that are required to be performed on the printed implants, which are as follows:
- Heat treatment: Heat treatment is usually performed on metallic materials to reduce residual stress and meet the material specifications. Most carbon steels and carbon alloy steels undergo the heat treatment process for the purpose of improving mechanical properties such as tensile and yield strength.
- Bead Blasting: Bead blasting is a cleaning process in which the printed part is bombarded with small glass beads using a pressurized air gun, removing some material and smoothing the surface. It adds a uniform matte or satin surface finish on a machined part, removing the tool marks.
- Tumbling Machine: Tumbling machine or vibro machines are used to obtain polished and smoother surface texture on the printed parts. A tumbling machine that contains small ceramic chips that vibrate against the object gradually erodes the outer surface down to a polished finish.
- Buffing: Buffing is a process that is used to generate extremely smooth, highly reflective, mirror-finish surfaces. It is not an essential step and is done as per the requirement.
- CMM and Material Testing: Geometrical accuracy of 3D printed parts is very important and to measure these parts, a Coordinate Measuring Machine (CMM) is used, which is a device that measures the physical geometrical characteristics of an object. Materials testing evaluate the characteristics and behavior of different material such as metal, ceramic, or plastic under various conditions. So CMM and material testing are done to confirm the geometry and material quality of the implant.
7. Quality Control: Quality Control plays an important role in the development of products and services in the medical field. It is a responsibility that ensures manufacturers meet the end-user needs in terms of safety, quality, efficacy, strength, reliability, and durability. To ensure the safety of the patients, we have employed a Quality Management System which conforms to ISO 13485 & ISO 9001 standards. We also conduct a variety of tests to meet the standard quality requirements of customers and medical organizations.
8. Packaging & Labeling as per standard: Our packaging and labeling process consists of four stages i.e. primary packaging, primary labeling, secondary packaging, and secondary labeling. Before primary packaging, the medical devices are cleaned in the cleaning and assembly room (class 10,000). Under the primary packaging, non-sterile medical devices are packed in Tyvek bags. Then in the secondary packaging, these bags along with the plastic bag, technical information sheet and use for instruction is packed in corrugated box.
There are certain labeling regulation laws currently administered by FDA, which needs to be followed for the labeling of medical devices. At 3D Incredible, we have adopted labeling as per regulation of CDSCO.
9. Final Product ready for Dispatch: After all the processes are completed and the implants are properly packed, they are dispatched from our warehouse. Customers can count on us for on-time delivery as we have well-established transportation services.
Conclusion:
We at 3D Incredible work tirelessly with a large group of skilled and experienced doctors & engineers who to develop a wide variety of 3D printing applications in the medical field, with the passion of helping patients throughout the globe. Our customized 3D printed medical implants are worthy and advantageous for the patients, doctors as well as hospitals.